Thursday, August 22, 2013

The Hand-Me-Downs of an all but forgotten industry


I remember wondering why they didn’t teach CAD programs at NBSS. Pencil and paper seemed very anachronistic, even for North Bennet. But looking back, it was also incredibly helpful, because we had to correct all of our mistakes, too, and come up with the details that a computer would simply have filled in automatically.  It taught me to visualize things better, and more clearly. That’s the first reason to practice hand-drawing.

The second reason is that the hard lessons are the ones that stick. I don’t want to have to re-work anything if I goof, so it behooves me to think things through. On the computer, it’s easy to draw things, so you don’t need to visualize, and it’s easy fix things, so there’s less incentive to pay attention. CAD makes it too easy to be sloppy.

Drafting programs make quick, clean drawings, but the accuracy is derived from the computer. When you go to the bench, the quality of your work is derived from your own attentiveness and care. And that’s huge. Drawing by hand engages the 'real, physical' part of the mind in a similar way to working with wood. It's a mentality builder, because you have to train your mind to visualize what you’re making ahead of time, and to execute that vision with care. That’s a mentality worth fostering, because it will really cut down on mistakes at the bench. The joke we used to make at school was: “Save a tree: Waste all the paper you need to.”

Thankfully, there are some really nice tools out there right now, for short money, that can encourage the process of learning.

---

I've been on a vintage drafting tool kick recently. What I've realized lately is that really, really nice vintage tools, tools that clearly have a history and a soul, are going for pennies on the dollar. Well, it may actually be pennies on the original pennies, given inflation, but they were clearly made to a much higher standard, and are remnants of a day when drafting was a serious trade of its own.


I was (am) using tools that must have been fairly pricey at the time. They're professional, well machined, well balanced objects that were designed and built for serious professionals. They are simply, and solidly built, and designed to solidly fill a need. And the more I use them, the more I'm starting to understand just how precise they can be, and it's pretty amazing. When I run my lead holders around in the cast iron sharpeners that I bought for $20 a piece, they come out SHARP. Much sharper than the .5 or .3 mm mechanical pencils I used to use, and certainly sharper than a regularly sharpened wooden pencil. And the ruling pens (and compasses with ruling pen points) are similarly cool. There's a learning curve to be sure, but the line quality has a character that I feel is missing in ball points.

Some of the difference is in the details. Here's a picture of a few different kinds of compass, two as built then, and two built and purchased recently.  (The one on the left is actually from a really nice beam compass, see picture above.) I suppose the new ones still function well, but they don't give the impression of precision that the other ones do. One example is the paper point. Originally, those were designed to penetrate in a minimal way, with a small point, and a big shoulder, so they don't go too far into the paper, and don't leave too much of a hole. But the versions in production today are huge, and the original intent of this kind of point (minimal damage to the drawing) has been forgotten. Anyone who has ever needed to make a few concentric arcs or circles (for drafting circular inlay, for instance) with a cheap compass has probably been frustrated by the size of the hole left in the paper. The vintage points are needle-sharp, but they're arrested in their penetration by a big shoulder that rests on the paper. Brilliance, I say. The picture is really fuzzy, but you can still see what I'm talking about.

While we're at it, notice one other detail on the compass on the left: The cutaway on the side. This is there so you can adjust the point, or the drawing lead, with your fingernail. The newer ones don't have that. It's a little detail, and one that I didn't pick up on at first. But it makes such a difference in use. I can't help but appreciate that this was designed for professional draftsmen... for people who would be able to appreciate the functionality of this subtle detail.

Then there are the horn centers. I have one of these in the old drafting set that belonged to Dad, and couldn't really figure it out. Then I was reading an old drafting book (circa late 1800s) that described their use.* Basically, it's a metal ring with small points to hold its location, and mounted in the ring is a clear piece of horn. (Or acrylic, in my case) The idea is that you can place the horn center over the center point, and then place the point of the compass on the horn center. That way, especially if you have multiple concentric circles, or arcs to draw, you can keep re-adjusting the compass, and not leave a huge hole in the paper from repeated penetration. AND, you get a more accurate drawing, because you're not trying to use a ragged hole as a precise center. Genius.

These are tools from over a hundred years of a serious profession, that have basically been dropped off at the flea market. Tools that were made with intent, and without patches or upgrades, are swimming in the purgatory of eBay, waiting to be useful again, even if the sellers don't always know what they're actually for. This is great for guys like me who can now afford really, really nice tools to draw with.

That said, it's a little depressing to think about. I'm working with tools that were made by people who took drawing seriously, in an age when most serious 'artists' are using computers. And it's getting to the point where some of them don't even know how to draw by hand. In short, the tools are evidence of human potential that used to be highly developed... and that we now choose not to foster... despite the advantages that it has to offer.

---

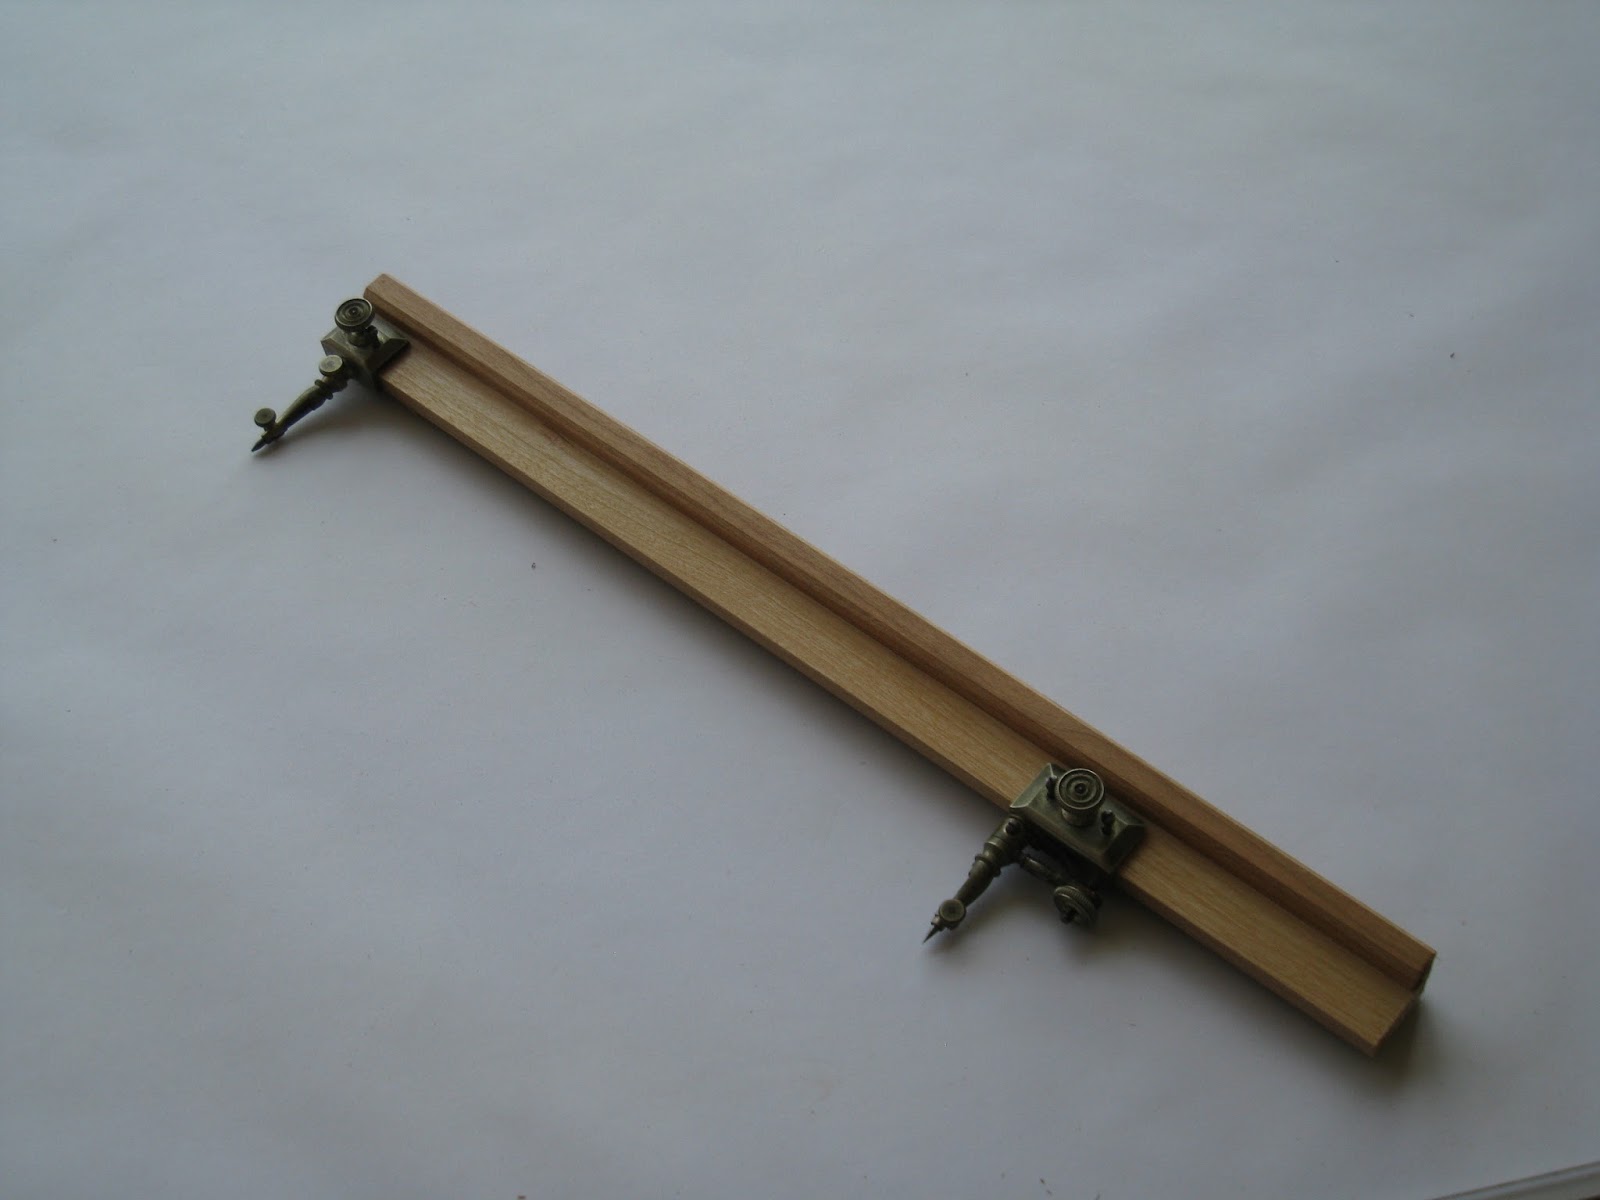
*Another tip from the vintage drafting book, draftsmen used to lubricate the pivot points of their compasses with hot bees wax. I gave it a try, just to see for myself. Unlike paraffin, beeswax is just a little bit sticky. It still glides smoothly, but it holds the setting of a set of dividers, for instance, very well. Much better than I'd have thought. It was another of those 'who knew?' kind of things for me. (Who knew? Professional tradesmen who drafted for a living, that's who.) It's been a game changer.

Wednesday, August 21, 2013

Quick photo tip: hooking an iPhone to a tripod with jig parts


For myself, this is the dilemma: I have no internet in the shop, so if I blog, it's either at home, downloading pictures from the phone or camera, or I blog directly via the phone. Sometimes it helps to be able to hold the camera steady to get a decent shot of a detail, or take an HDR shot, but the phone has no way to connect to a tripod. So, I swapped out the mounting screw in the tripod for a long T-track bolt, with a production stop on one end, and a scrap of MDF to hold the other side of the makeshift clamp.

Sunday, August 11, 2013

Tool cabinet, modularity, and 10 years

Come September I'm going to start moving into a new shared space. In the meantime, one of the things that's on my mind is maintaining as much functionality as possible while I move, and minimizing down time while I get set up again.

On top of that, I realized recently that it's been 10 years since I took my first fine woodworking workshop at North Bennet. Ten years of woodworking feels like a long time. I'll spare you the trip down memory lane, though.

To deal with the first, and celebrate the second, I decided to build a larger tool cabinet. After 10 years, there are some tools that I use every day. There are others that I use more than I thought I would. And, there are tools that I still own, and love, don't use as much as I used to... and can't bring myself to sell. (Yet) Altogether, it's a pretty substantial collection. I definitely appreciate the modesty and practicality of maintaining a pared down set of tools, in despite of my penchant for plane hoarding. But I also have a lot of frequently used jigs and specialized tools (store bought, and shop-made) that need a designated but accessible space, so that they don't get buried in a pile on a shelf somewhere, or become damaged for lack of a suitable home.

For the past year and a half I've been using the shorter of these shop carts to support my North Bennet chest. It's a stout little mule, and has supported my North Bennet chest very well. But other tools had become refugees, sitting around on shelves and in odd places, and so I'd been scratching my head over the design for a new cabinet. Then I found  this wall cabinet that was divided vertically in twain, with a plane ramp on one side, and a set of adjustable shelves on the other. And that was the last bit of inspiration I needed. The shop has been idle while I waited on the deposit for the next project, so I took advantage of the free time and put this together.

I resawed the rails and stiles out of a long piece of 12/4 ash that I've had leaning in a corner for a while, and put it together with draw-bored tenons. But I'm not going to go too heavily into construction details beyond that, because this project has taught me something interesting: Tool chests can (and maybe should) be as much a product of your evolution as a woodworker, as they are a fun project to scratch your head over. And it made me re-visit some of the other tool cabinets that I loved and pored over so much when I was getting started.

-This cabinet came together very quickly in part because of the simplicity of the modular design. I already had the base, and I already had the tool chest that I built 8 years ago in school. But the project went even faster, thanks to the parts and pieces that I already had on hand: The ash has been kicking around for a while, the plywood pieces came from the scrap bin. The molding that I used on the shelves and the bottom of the plane ramp were scraps that I'd saved from the bookcase project last winter. The center panel of edged cherry plywood came from another project.

H. O. Studley's tool cabinet is a paragon of meticulous planning and workmanship... but there are so many little bitty pieces of ebony, ivory, and mother of pearl, I can't help (after this project) but wonder if maybe a lot of his cabinet was made up in stages of smaller pieces and scraps that he'd made or squirreled away over the years, that he couldn't quite bring himself to throw away. It's entirely possible that it's not, and that the entire design was planned to perfection and executed all at once, from raw stock. to externalize the ravings of his genius mind. But a lot of those little bits and details now look more to my eye like the collection from a scraps and 'could come in handy' drawer. It's pure speculation on my part, but I have an easier time believing the latter theory.

-The top of this cabinet was built to match a base that I'd already made, and had been using for a while.

I studied pictures of Andy Rae's famous cabinet, and realized that the top is separate from the base. I don't know if it was a similar evolutionary process or not, making one section and then the other. But it makes me wonder why he didn't just build one big unit, or if he at least planned initially to build it in stages as time allowed.

-I made the frame to be bullet-proof and permanent... but the side panels and the cabinet in the upper bay are just plywood that's pocket-screwed into place. That way, if I decide later on to rip out the ramp and shelves and install something different, they will leave no lasting trace on the frame but a few screw-holes. The body of the cabinet will still look good, but I can reconfigure it pretty easily.

When I was planning this cabinet, I took a look at pictures of Chris Becksvoort's tool cabinet. And I took a good look at his plane ramp and saw some screw holes and lighter spots on the wood of his plane ramp... which tells me that he's re-configured it at least once. That's not a criticism, it's an affirmation. Methods evolve, theories evolve. Even for master craftsmen. Leaving room for that evolution makes more sense to me, in the long run, than committing early on to a heavily detailed chest or cabinet that may or may not prove its worth over time.

When I built my tool chest at North Bennet, I sized the bottom drawer so that I could replace it with a plane gallery. A plane gallery wasn't within the scope of the project as laid out by the Cabinet and Furniture program, but I figured I could add one later, if I designed in the space for it at the outset.

Next steps for this particular project include doors, and possibly putting cubbies or drawers in the bottom section.  I may decide someday to make inlaid or carved panels to replace the plywood, too. Or, I may decide to do something else. But, one thing at a time. 

--

The lesson I want to pass on to new and aspiring, or experienced novice woodworkers is... don't try to build your 'dream cabinet' as a beginner. Build something appropriate to your needs... and leave room for expansion. Like your methods and your work, your dreams will evolve.


Wednesday, August 7, 2013

End of an Era... a fond farewell.


Back in early June, there was a farewell party at the old building: North Bennet Street School is moving... and will no longer be located on North Bennet Street. This, after 131 years. You can read about the proposal here, and read the Under One Roof blog, if you're interested. 

I've read annual reports from over 100 years ago. The old building was as much community center as it was a school. Locals could come by to take a shower. There was a chapter of the SPCA located there. And, before it moved on, Gustaf Larsson's Sloyd Teacher Training School was housed on the 4th floor. There's a lot of history in that building... which was actually 3 buildings that had been combined. There's a lot of good Karma in the space.

All things change, and I get it, and I'm incredibly excited to see the new building. But it still makes me a little sad to know that the old building as I knew it will be gone. The 4th floor will be gutted and rebuilt to serve the needs of the K-8 students that will be moving in.

This is some of the space I remember:


This is an award-winning reproduction Seymour dressing table, built by Alastair Boell in his last semester, sitting in front of his bench space. His bench was the first, to the right, when you walked into the upper bench room, so this piece got a lot of attention. (It's worth opening the pic in a separate tab or window to be able to zoom in... the detail, even in the 3Mp photo, is still amazing.)


My bench area, 3rd semester. On the right is a cherry blanket chest that I was building. My tool chest is in the background, and the stepstool was a project from the summer of 2006.

Holiday Party 2006

The last photo is from the holiday party, 2006. Every year, the holiday party takes over the floor. People bring in food, drinks, etc, and all of the shop-made toys come out... tops, (including a whopper 10" diameter top that sounded like a rolling thunderstorm when it wandered across the floor) whistles, and other games... and yes, music is played. And yes, that's Lance Patterson playing a hand-saw, with a violin bow.


---


When I walked around this June, things were already being taken apart and moved, and I'm told that all kinds of old treasures were seeing the light of day in the process.  As of June, this is what it looked like up there.


View of the bulletin board when you step out of the elevator on the 4th floor. It's the first thing you see when the doors open, and it really took me back when I saw it again.


Doorway to the CFM teachers's office.


The library looks a little bigger than it was when I was there. As far as I know, the chippendale book cabinet was built by Lance Patterson. (senior instructor)
Lance Patterson talking to Michael Wheeler, in what was the old demonstration area.

Doorway between the bench room and the machine room.
Above the doorway to the machine room you'll see a collection of student's place holders. These were small plaques or scraps that we wrote our names on, to hold our place in the machine room. The system was pretty simple. If someone's using a machine, and you want to use it next, you give them your place holder, and when they're done, they leave it on the tool. Same applies if you're at the tool and need to step away for a minute, but you're not done. With 40 students and only 3 table saws, this was a pretty necessary system to implement.

Typically, graduating students will nail their place holders onto the wall, or up onto the rafters, just to leave their mark on the place.

I asked about what was going to happen to all of these, I was assured that they'd be taken down, and moved to the new place, for safe keeping.

View of the rafters, and the various souvenirs left behind by previous students.


This particular souvenir is a flag left behind by Alastair Boell before he left in 2005. His last semester coincided with my first, so I got to know him a little bit. He was a great guy.

More souvenirs. The Easy button was left there by my shopmate, Don Price.

Bang, Crash, Boom... James is using this machine. My placeholder, still up on the rafter by my bench area.

My bench area, and my window that faced the Old North Church.

My area, the neighboring area, and the stairs that led out to the roof deck.

3rd floor, the stairs leading up and to the right led to the finishing room. The doorway at the bottom of the stairs leads into a room that was used for storage of various things, for sanding, and as a photo studio for taking pictures of student work.


Thursday, August 1, 2013

Rule Number 8 for Asking Questions

Yesterday, Chris Schwarz sent a few hundred readers my way. Thanks, Chris.

Last night, Chris put up a video, and gave a narration on The Art of Asking Questions, as quoted from The Manufacturer and Builder, circa 1870. There were 12 rules, but he skipped over rules 6-8. If he hadn't done so, my curiosity would not have been aroused with regard to the missing parts. Having found them, I felt the need to expound on rule number 8.

(I found the source material on google books, and bound paperback copies elsewhere online... leave it to Chris to find new things for me to spend money on.)

Rule number 8:

"The Way to remember the answer to any question is to associate it in the mind with other answers connected with the same subject. It is well, therefore, to follow one subject, if possible, until sufficient has been learned about it to be easily remembered; for the more one knows, the more one can remember, while isolated facts soon get lost. As my father said, "Wholesale stores are the easiest to keep in order."

In other words, take the time to gather up a knowledge base before you ask more questions on the topic, so that the answers will make enough sense (in the context of what you understand) as to be useful. 

I think this is one of the best explanations I have ever found for why I think it's so important for would-be woodworkers to get off of the internet, and get back to the bench. In context, the usefulness of some of what can be found online will be incredibly evident. And, the lack of usefulness of some of it will be evident.

When you spend enough time at the bench, things will begin to call out to you in a different way. There's a part of the brain stem called the reticular formation, that's responsible for your ability to sift through piles of ongoing stimulus. When someone says to focus on everything red in the room, the reticular formation is the part of the brain that highlights the objects that you're filtering for. When you're regularly engaged in woodwork, it's also the part of your brain that will find things in daily life that will help solve whatever problems you're trying to figure out, whether it's a book, a tool, or a new way to organize your shop. Whatever the problem is that's been distracting you, it's the reticular formation that is always on the hunt for the solution. (Thank you, Malcolm Gladwell.)

The useful stuff will call out to you, if you have the contextual knowledge base to put it to use. Better solutions to problems you've already solved will scream out to you. But it's all only useful in context, and if you've spent too much time reading message boards and blogs, and not enough time at the bench, you'll have a lot of information in your head that will be hard to put to use in a way that makes sense... and you run the risk of combining things that don't make sense.

For instance, I recently saw a sketch-up plan online for a 'Split-Top Roubo MFT' workbench.

Anyone who has used an MFT (festool work table) knows that it's a pretty inspired piece of equipment. It's portable, lightweight (for what it is) modular, holds the work, guides the power tools, and it's a great platform for building up new methods of working with Festool. It also derives a lot of functionality from the ability to hook the L-shaped bar of their F-clamps through the surface, to hold the work down, and the surface is meant to be replaceable, because it's constantly getting chewed up by the track saw. Currently, Festool is on the 3rd version of the MFT, and it's clearly evolved to reflect what has been learned in use.

If you've dug far enough into the Roubo paradigm, you appreciate that it's a monolithic work surface that is big and solid and provides a lot of convenient ways to hold the work, and it's a surface that will settle out over time, and stay pretty flat, which is important for hand tools.

Drilling a lot of holes through the top to emulate an MFT isn't really a great idea, given that the clamps wouldn't be able to hook through. And habitually chewing up a reference surface with a track saw seems like a goofy thing to do.  And, it's not portable, or something you can put away in a garage shop.

In short, the OP spent a lot of time, and tried too hard to bring two of his online worlds together. But the sum of the two is ultimately less than either of the parts.

Because this is the internet, I'll probably get bashed for dumping on someone's dream bench*. The point I'm trying to make here is that it's important to use reality and in-person experience as a filter to sift through the things you find online, and not to use the internet to define the work that you do. I'm sure that he'll find a way to use his bench efficiently in time, but for now, it seems like a shining example of someone whose designs were influenced too much by what he read, and not enough by what he's done. He hasn't done enough work to distinguish the virtues of either paradigm, so he can't see the incompatibilities yet. And, he won't, until after he's spent a lot of time and money. And that's a shame. If he'd gathered enough experience to know what he needed, and what would be useful, the end product would likely be very different, and a lot easier to put together and work with.

The moral of that story: Take the time to understand the context of your questions, so that you understand the import of the answers.

---

In the context of inspiration, the germinating seed for last night's LAP blog entry, creating a body of work that will give you the context to ask bigger questions can only help you to be inspired by other bodies of work. For myself, one of the thrilling aspects of looking at old work, and old methods of work, is seeing how someone else solved a difficult or complex problem.

One of the elements of a really good epic story is the sense that the reader is given that the roots of the story go so deep as to be lost in the mists of time, barely perceptible, but still there. In creating middle earth, J. R. R. Tolkien wrote volumes of back stories for every race and creature, going back ages, and it contributed to the texture and depth of his work. The context and the details add so much more to the motives of each character and culture in the book... and so it is for woodworking. The best work that modern woodworkers strive to recreate was done in an age that predated electric lights or a lot of modern machinery. Some of the approaches and methods used then are still useful, and in some cases pretty sophisticated, despite the crudeness that modern observers might ascribe to the tools. And those old methods still have a lot to teach to anyone who's paying attention. (See my review of By Hand and Eye) 

For all of our CNC magic, and 3-D printing, we still don't have many people who are producing work on the level of the Seymours, Roentgens, Townsends, or others. (To be fair, there weren't that many back then, either, which is why they remain distinguished.) And much as I love Stickley, The Hall brothers, Nakashima, Esherick, and Maloof... they just weren't operating on that level. I don't know enough (yet) about marquetry and hidden mechanisms to ask questions of Roentgen furniture. I'd like to, but I do understand that I need a higher level of understanding and context for the questions to be meaningful. That's the difference, really, between a worthy question, and a 'lazy, impertinent, or conceited' question. (See rule 4) And there are a lot of lazy, impertinent, and conceited questions that get asked sometimes on the internet.

So, stop reading this. And get back to work.

-J


*With luck, the OP of that thread on the Festool Owner's Group will never see this blog entry. I'm sure he put a lot of thought into the bench, and it's not my intent to publicly humiliate anyone. So, if he does find his way here, for what it's worth, I'm sorry. That said, his bench provides a very good illustration for my point, and will hopefully help provide a learning opportunity for others.