Showing posts with label Shop tips. Show all posts

Sunday, May 19, 2013

Installing molding on solid wood cases


I don't remember where I found this particular tip... I think it was an old Fine Wood Working magazine.

Because the case is so wide, there's going to be a fairly significant amount of wood movement, so brad nails won't cut it here. The case will likely expand and contract by as much as 3/16" over the course of the passing seasons here in New England, so it needs to be able to do so independently of the molding.

So, to hold the molding to the case, I cut a dovetail groove in the back of the molding, and cut matching splines that were glued and nailed to the case. Once the splines were attached, I slid the molding into place. The front molding I glued on completely. Because it's long-grain to long-grain, it doesn't need the splines, but they certainly help with alignment. The side moldings were glued onto the front-most spline, and the first few inches of the case. The rest is only held on with the splines.

Cutting the splines doesn't have to be a nerve-wracking exercise in precision. If they're a smidge loose when you make them, you can take a shaving or two off of the mating surface, and it will tighten up the final joint. Because they're not going to be regularly visible, it's not a big deal.

In the picture below, there are two gauge lines. Originally, I thought it would be good to use a gauge line for the nails, which were set up in pre-drilled holes in the splines. Bad plan, minor discrepancies made a mess. So, there's the second gauge line, which is simply for placement of the upper edge of the spline, which worked much better. 


Tuesday, May 7, 2013

Wood Magnet


The first step before joining a case is to smooth the inside surfaces. On this project, the sides are all pretty big, and I was in a hurry, so I opted to sand instead of plane them.

I've tried various sanding pads, designed to hold the work to a surface. I was using something like this, but once it started getting dusty, it stopped working. On a whim, I pulled out a chunk of leather that I've had for a while, and clamped it to the bench top, stretched out.

This is the best sanding pad I've ever used. I don't know or understand why leather holds as well as it does, but the Festool Rotex is a steam train of a 6" sander, that switches between rotary and random orbit modes, and the wood held to the bench just fine. Better than fine, actually... it felt like it was being held in place by a magnet. Very impressive...

Next, I need to mount some of this stuff to the inside surfaces of my pattern vise.


Sunday, January 29, 2012

What did I learn today?

A lot of my shop philosophies are a mash-up of things I learned in Getting Things Done, and The Toyota Way, mixed with a little bit of Gantt charting and a few other things. One of the big issues is planning out the work that I have to do, so that I can do it, without completely spinning out about how to do whatever it is that I'm supposed to be doing. For a start, that's not too bad. And if I write down my plan, and a list of what's coming up, it helps me to be productive when I come in the next day.

Lately, various things have been conspiring to keep me away from the shop for a few days at a time, or wildly distracted when I'm there, and there have been a few days lately when I've wandered in, thinking "Ok, what was I working on?" So one of the things I've been focusing on is maintaining a shop log, as part of that plan. That way I have some idea what's going on if something weird happens, and I have to be out, again, for a few days.  A decent log will tell me what I was doing when I left, and I'll have a short list of "what to do today," waiting for me when I come back in. I can proceed with the project without having to re-invent the wheel that had been rolling right along just a few days before. I hate re-inventing the wheel. I hate it even more when I have to keep doing it.

So, I've also been logging a section titled 'What did I learn today.' Writing down one or two things, even if they were simple, works miracles. For starters, it helps me hold onto little lessons, and that's important. But it's also been a startlingly good way to  put myself back into whatever I was doing last time I was there, because it prompts me to remember the mental context of what I was working on when I learned whatever it was, and it really puts me right back into that train of thought, so I can keep going. As a mnemonic device, it's pretty cool.

Friday, December 16, 2011

Quick tip: improvised honing jig, Derek Cohen style.

I needed to adjust the bevel on my Japanese chamfer plane yesterday, and I was in a hurry to get it done so I could catch the train. So, I threw together this simple scrap wood honing jig. The wood wears down on the bearing edge, so the sharpening angle changes a little bit, but it was a quick and dirty way to get the job done, and it worked well. It's also a simple way to sharpen some of these hand-hammered irons that aren't perfectly flat or square, or small irons, because you can make these jigs as big or small as you need.

The source material for the idea is on Derek Cohen's website. He's big on making shop jigs and tools and so forth, and this is just a good idea. It works better for the scary sharp (sandpaper on glass or MDF) folks, because the wood block won't wear down quite so much if it's riding on the glass or MDF, next to the sandpaper. For woodworkers on a budget... this is a fast and easy way to get things done.

Tuesday, May 24, 2011

Quick tip: Arbor nut retrieval tool

The theme today seems to be things to do with string. Oh, well. :)

Once in a while, I'm swapping blades on the table saw, and I drop the arbor nut. The Sawstop has a shroud which dumps into a dust collection hose, meaning I have to get under the saw, take stuff apart, and get messy. It's a time waster and a hassle. So, this is a simple tool I made with some mason's twine, a rare earth magnet, and a magnet cup.

String goes through the screw hole, and a knot is tied to keep it attached. Then add the magnet. Holding the other end of the string, drop the magnet in after the nut, and fish it out of the saw. Very easy.

Tying the knot

So, as a result of getting married in October, I had a new safety issue: my wedding band. No wearing rings in the shop! This is something I learned in the Army, because they had safety posters everywhere of a hand with a de-gloved finger. If you're squeamish, don't look any further into the topic. Just take my word on it that you shouldn't wear rings around machinery.

The real problem for me isn't taking the ring off, it's where to keep the ring. If I put it down, sure as hell I'll forget where I put it, leave without it, and never find it again. My solution was simple: I wear a cord around my neck, and when I'm in the shop, I tie the ring to the cord. But there's a simple way to perform this operation without taking the cord off, that never fails to confuse people... and impress them.  So, it's a combination safety tip and party trick.

I took the cord off, for purposes of illustration. But I typically do this while wearing the cord around my neck.

Step one: pull a loop through the ring.


Step two: pull the loop over and around the ring.


Step three: pull down on the ring.


Ta daaaa...

Monday, May 23, 2011

Biesemeyer Fence Micro-Adjust

I love my Biesemeyer fence just as much as the next guy. It's solidly square, reliable, durable, and, well... it's just solid. But I got tired of doing little love taps with a fist, or my knuckles, or slapping it a bit, to try to move it just a smidge, or a hair, or some other nonsensical invented dimension that would work. I really needed a way to do small adjustments. I saw an attempt by Rockler to make a magnetic micro-adjuster, but all the reviews I read said it was junk and worth skipping. So, I did some head scratching, and I'm pretty happy with the solution I came up with.

I already have T-track inlaid into the extension table on both my SawStop, and my Delta contractor saw. I put it in at the recommendation of Jim Tolpin's book, as it helps with saving a fence position. (Bolt a block of wood to the T-track, snugged up against the fence, and you can always move the fence back to that setting.) I've also used the stop block to set measurements for long cross-cuts using a short miter bar. So, I put together this simple adjuster, using some all-thread, 2 wooden blocks, a knob, a threaded brass insert, and a plastic nut... which happens to be included with the packaging for the T-track.

The plastic nut is there to keep from scratching up the fence, but isn't entirely required. A scrap of wood would do. And in some cases, where the fence has to be closer to the blade, I need to use a block of wood to span the gap between adjuster and fence anyway.

The rod is threaded 1/4-20, which is 20 threads per inch. So, one revolution moves the fence 1/20 of an inch. (.05") And 1.25 turns gives 1/16".

The knob has 4 internal ribs and 12 external nubs. 1/20 of an inch, divided by 12 (moving one nub at a time) moves the fence 1/240" (.004") so moving from the peak of a nub to the bottom of the hollow between nubs is ~.002. I'm sure I could get more anal if I wanted to, but .002" is a pretty fine adjustment for a table saw.

Beyond that, if I want to get more precise I'll have to keep my saw blades a lot cleaner.

Friday, February 11, 2011

Shop tips

A better glue bottle

This was originally the product of my frustration with store-bought glue bottles. I had one that was getting clogged, and I squeezed a little too hard during a glue up. The top came off, glue went everywhere, all over the project, and my temper went through the roof.

Soda bottles are rated for pressure, so I knew it wouldn't blow out on me. (If you don't believe me, put a cap on an empty one and stand on it.) And it brings its own benefits. Drilling the cap on one side gives more control over the glue stream, because a little rotation of the bottle one way or the other will re-align the stream. It doesn't have a long, pointy nozzle to get clogged up. And depending on how big a hole you drill, the bottle can dispense small, controllable beads, or deliver massive quantities in a hurry... whatever's called for. And if you decide later that you want a smaller hole... well, shucks. Where will you ever find a new cap? Oh, right. EVERYWHERE.

I don't know how the chemistry works, but titebond I doesn't seem to bond with the plastic at all. It'll build up on the cap around the hole, but it pops right off when I pick at it. And it doesn't stick to the inside of the bottle at all. I've been using this bottle for a few years now.

And the price is right. A five cent bottle deposit is much cheaper than the $2-3 you'd pay for a dedicated glue bottle at the hardware store.

-------
Production crosscutting stop

I tried to work this into the first entry on the crosscut sled, but it just didn't fit. This is a crosscut stop design that I discovered when I had a shop in Medford. It made sense immediately when I saw it. There's about an inch of wood hooked onto the hinge. Flip it out of the way to crosscut something to rough length, and then flip the block back around when you crosscut the other end to finish length. It's a great production tool.

Thursday, January 27, 2011

It's a hand warmer!

So, I've gotten remarks from various people on the shape of these mugs. Yes, they're weird.

But they're great for warming the hands on cold days!

(Note that both of my hands are actually in the picture. To take this shot, I had the Emmert vise rotated 90 degrees, to hold my iPhone high enough to take the picture... and touched the screen with my nose.)

Thursday, January 20, 2011

Shop tips 1/20/11

This is the first entry of what will hopefully become an ongoing, but probably not regular segment on things I find that help with productivity.

Reliably repeatable crosscutting of long parts.
I was trying to find a way to cut long parts for some frame and panel sub-assemblies the other day. I have a long fence that hooks onto a miter gauge, but the parts were even longer than that. The solution that I came up with was to use the long bar to the right of the blade, and set the length of the part with the table saw fence. Since this is an inherently dangerous operation, I needed a way to use the fence to set the length, and then have the fence slide out of the way. But I had 8 of those parts to cut, and only felt comfortable cutting one at a time. And I wanted a precise way to position the fence.

I have a length of T-track set into the extension table, which I put in there to hold fence settings, in the event that I needed to cut something smaller, and then go back to the other setting. I switched that up a bit, using the setting holder as a stop for bringing the fence back the same position again and again.


Another use for the pattern vise
I've been seriously loving the Emmert vise. Oh, man, so worth having.

I was using my Festool domino to join the frame and panel assemblies together yesterday. I'm used to clamping every piece to the bench top, and un-clamping every time the part needed to be moved or flipped... sometimes having to use 2 or 3 clamps on the longer boards. Then I remembered that the Emmert pivots 90 degrees. I feel like a tool glutton. I'm in hog heaven. Using the vise is SO much easier than using clamps.


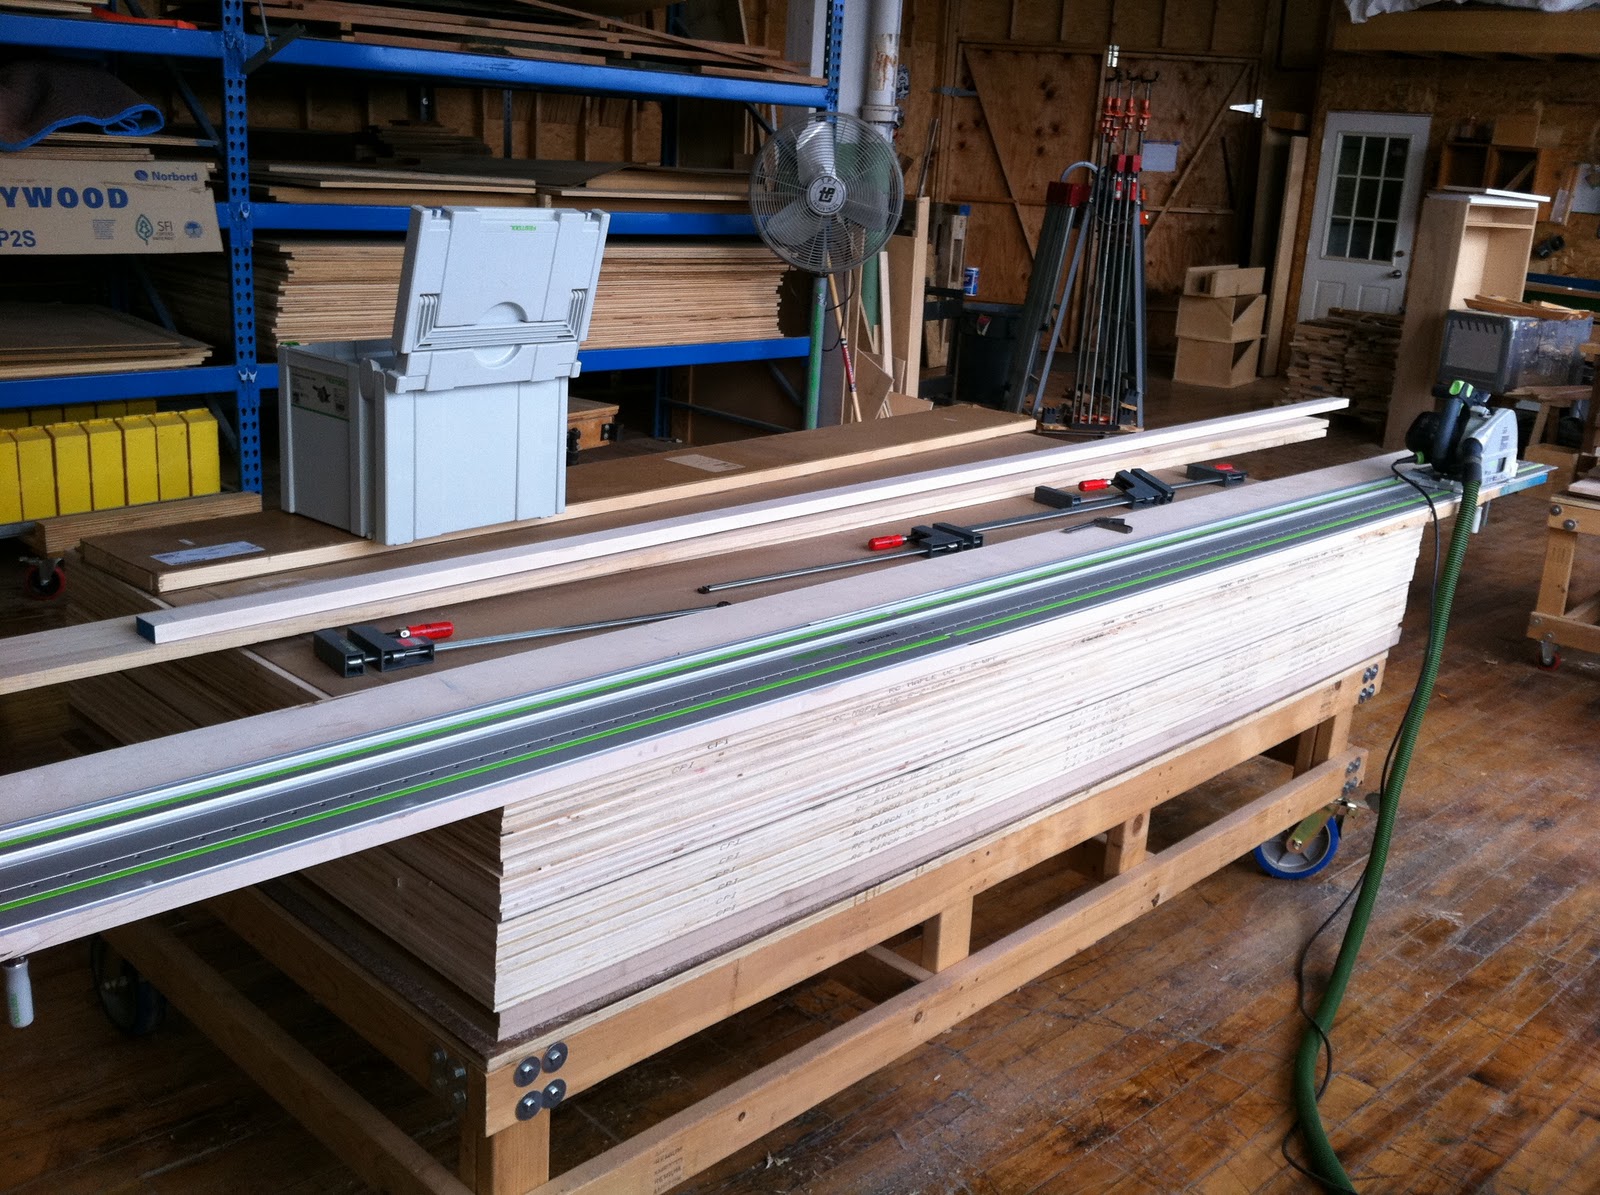
Accurately edge jointing really long boards
I'm not sure if this is really a helpful post, or if it's just me showing off some of my coolest toys tools.

In any event, this was the easiest method to straighten a 12' long board that I've ever used. I love Festool.