Wednesday, December 8, 2010

I realized the other day that it's been almost a month since I'd put anything up. Part of that is because I've been focusing more on my kitchen blog, simply because it's easier to cook up a bowl of spaghetti and take pictures than it is to cook up a really nice looking slab table. Quicker, too. And easy victories are rewarding in their own way.

I've been busy, and making slow but steady progress. Work is coming in, and I haven't wanted to jinx anything by jumping up and down and shouting it from the mountain top... or at least... from the lap top. But suffice to say, things are looking up. I took a deposit on a small job last week, and there are more in the works, and other shop work is slowly arriving.

I'm taking today to write about life in general, my life in specific, and to muse a bit on my life right now. I hope you'll indulge me.

Now that it's been almost two months, I feel remiss in neglecting to announce that on 10/10/10, I was married to Ariel Leora Persing. It was a wonderful day. Some of the photos may be found here, on the blog of our photog for the day, Todd Matarazzo. I can't speak highly enough about his work, and his work ethic. Todd is very easygoing and personable, and he makes high energy look very low-key. He was constantly, but unobtrusively everywhere. And while he never conveyed the impression that he was in a hurry, he moves quickly.

Since then, I've had time to relax (sort of) and take a look around. Getting married was a major victory, and it really allowed me to move into a different head-space. It led to the Basic Assumptions entry, and to a lot of thinking about life, and work, and what's been driving me. I won't go into the process in detail, but I will say that I've come to realize just how much my fears and insecurities have been derailing productivity. Taking the time to dig through my preconceptions of what small business would be like, in any economy, has helped me figure out a lot more about what I want, don't want, and where I want the process to take me in the future. I've also had to examine just what I want to say, and how I want to say it. This blog has crossed the 2000 page view mark, and it's being read regularly in a number of unexpected places. Despite the fact that I haven't written in a month, I've had over 300 visitors in that time. It makes me wonder what people like about the blog, and what they'd like to hear more of. (I'm not kidding... please feel free to comment.)

When this started out, I meant for it to be a professional, 'come, check out my stuff,' kind of blog. What it's turned into is a sporadic window into my struggles with the shop, and with small business, and with myself. I still need to put together a new website. But I think that when that happens, I may have to start up a whole new promotional blog... this one feels too personal, in a way, and it may not be what people want to read about if they're interested in my furniture. Or, maybe it is... I have no idea.

Either way, thanks for reading, and bearing witness to all of this so far.

Gratitude

It's been an interesting month.

Since the last entry, I've met with an interior designer, and it looks like there's the potential for work there.I'm currently working on projects for friends and friends of friends, which is fine. Work is work.

Lastly, but certainly not least, I've been going through a lot of mental changes, which are being reflected in the physical layout of the shop. In essence, I'm still struggling with how to work most efficiently, and how to reduce the level of clutter. And I'm trying to be brutally honest about just what kind of work I'll probably be doing. I'd love to be an ongoing laboratory dedicated to evolving styles of work. And I'd love to really sink my teeth into hand tool skill development. But a small business needs money to survive. And that means being able to produce.

I'll get into the physical details of the alterations later. But for now, the spiritual adjustments are taking the most effort, I think. I've been spending a lot of time digging through old notes, and remembering how I envisioned the business when I first got set up. It's pretty funny in retrospect... I was terrified from the start. I would spend days reading and studying organization techniques, and time management, and so on. I'd spend half of a Sunday sitting in a black recliner writing up outlines of all of the things I wanted to do, and how I was going to get them all done, and organizing my efforts to get organized... and making a lot of work that kept me doing just about anything but work. I think I knew, even then, that I wasn't really ready. That was back when I was still working in Medford.

Since moving to Lawrence, I've been grappling with how to chase the dream. I've spent a lot of time outside of the shop at other jobs, working in various composite materials, while I got used to the idea of doing business. And this morning I was clearing out and organizing the piles of lumber in the racks to make it all more accessible, and I noticed something.

Up on the top shelf, I'm storing a lot of the 'interesting' lumber. I have a slab and a bunch of shorter pieces of brown bird's eye maple, all cut from the same tree. I have a few pieces of tap-hole maple. (Maple, tapped for syrup. The boards have holes in them.) I have Cocobolo boards I've been carrying around since the summer of 2004. There's some pieces of quarter-sawn oak. And a small pile of Hawaiian Koa, most of which is 3-4 feet in length, that I picked up for a song. And then there's the big and tall section, populated by beams and planks of 3-4" thick stuff. And so on. Most of the lumber I picked up at a pretty decent discount, too. The problem is, I have ideas for all of it, but no solid plans.

As a woodworker, I know I'm not alone. As a businessman, I'm ashamed. I have a pile of inventory that has been mentally labeled 'to be used... but not now.' It's not that I can't come up with ideas or designs for these pieces of lumber. It's simply that I'm intimidated.

I got into woodworking because it inspired me. I wanted to be creative and productive, and make really cool things. But as soon as I hung the 'business' label on all of it, it strangled me.

I feel like I've been carrying around a huge debt, owed to potential that has yet to be realized. I'm finally learning to put that down and just do the work. And I'm trying to set up the space in a way that is more about what works, and less about how it should work. I'd like to get my head wrapped around doing the work I want to do, without beating myself up about how it's supposed to look.

Basic Assumptions was the beginning of a lot of soul-searching for me, around woodworking, business, life in general, and being tired of living in almost constant fear of my own decisions, and whether they (or I) would measure up. Since then I've come to realize that I still own a shop. I'm still a small businessman. I'm scared out of my mind about all of that sometimes. But it's a whole different world and way of viewing things that I never would have had the chance to see. The land of small business is not for the small of the weak or the fearful, and it's been a brutal couple of years while I've tried to catch up and grow into the role I aspire to have. And while I'm still shoveling my way through the shifting sands of my own insecurities,  I remembered something important about all of it this morning.

Regardless of how intimidated I am sometimes, I'm very, very grateful to be here.

Monday, November 8, 2010

Basic assumptions

This is a chunk of concrete I found next to the building that houses our shop in Lawrence. The letters for the word are molded into the concrete, and, as I found it laying on its back, the letters had filled in with moss and dirt and water. And the block itself was sitting on top of the stub of a wall that has long since been torn down. I have no idea what prompted the worker or designer or architect to mold this particular word into this particular block, but the fact that it's getting covered in moss, sitting among a part of the building that is essentially ruins, is what really gets me. The notion of the everlasting, buried among the commonplace decay of a city that was once a really great project is pretty striking. Given the newness of the block, I can't help but wonder if it was maybe an art project of some kind.

It's a basic assumption... that this, (this world, this time, this building, this love, this chance, this person) is going to last forever. It's a romance that seems unique to man's ego, and it seems like the kind of aspiration that is all too common. I'm going to [do something, build something, love something] great, and my effort and this love will make [whatever it is] immortal. And then I'll use the four holes in this block of everlasting concrete to bolt this sign up there, just so people can see that this thing that I hold so high is going to last FOREVER.

I can only imagine that the builders of this town had hoped something similar for their project.

---

I had also been hoping that my love of woodworking, my talent, and my own estimation of my intelligence would build my woodworking efforts into something truly grand. Some of it was ego, and some of it was romance, and a little bit of it was delusion. I'm not trying to wax melodramatic here, I'm putting this down for the sake of any small business owner or aspiring artist. Somewhere along the line, the basic assumption crept in that some of the key happenings would simply happen. And when the business didn't simply thrive, it became a root cause for some serious self-esteem issues on my part.

I've been working on figuring out why, after a couple of years, the business hasn't thrived like I thought it would. The economy was an easy scapegoat. My own non-specific inadequacy was another. The truth is a little more simple: I didn't plan for it to. I don't know how to wrap the words around it, and the mental image is not the same thing as planning for it to fail. But I hadn't really wrapped my mind completely around what success would look like. Because I was so much in love with the work I wanted to do, I just wanted to do the work. I hadn't really made a map of the things that needed to happen.

My lack of self-esteem demanded that I go forward on the assumption that it would all work out. I didn't have it in me then to pick a fight of that magnitude. I didn't understand how it would work out, but various people assured me that I was Smart and Talented enough, surely I'd be fine. I went on, thinking of myself as the big dog in the fight. But there's a saying about the size of the dog in the fight. Going to one of the best woodworking schools in the country only gave me a chance to get into the ring... not to declare myself a champ. And the truth is, the last place in the world I wanted to be was in the ring.

The simplicity of what I remember dreaming about was just a place where I could do the work I wanted to do, and that the people would somehow show up, because of me and my talent. When I thought about what I wanted to see for the future of my business, I saw myself at the bench, in front of a half-finished work of the cabinet maker's art. I didn't see the rest of the work that I'd have to do. I've been beating myself up for the way business has been going. The logic is simple: this should have worked out by now, and so clearly I'm not living up to my talent or intelligence. I'm only now realizing that it's not a question of living up to my talent or intelligence.

In the grand scheme, I'm just a guy. Distinguishing characteristics and achievements aside, I'm only human, and I walk on the ground like everyone else. But I want to aspire to something better. My woodworking career is the mountain I want to climb, and not the point of departure. Talent and intelligence, in whatever quantity, have enabled me to feel entitled to the mountain, somehow, and not simply entitled to the opportunity to fight my way up.

To be fair to myself, I need to write somewhere in here that five years ago, if I hadn't already inherited the money to take the chance at even going to North Bennet, I never would have taken it. I just didn't have it in me. It took a pretty big doorway being wide open to convince me that maybe, just maybe, I could get through that doorway to an opportunity. The problem with low self-esteem is that even little things like making it through a such wide open door, can feel like such major successes that it feels like anything is possible, and that just getting to the opportunity to fight, is an arrival in itself.

The fight I have in front of me is something that I wouldn't have been able to approach before. But with the ongoing process of personal growth, and the recent successes I've had in other areas of my life, I think I'm ready to be in the ring.

---

Lastly, I have been going through something similar in the shop-space. Until recently I, and my shop mates, have enjoyed a LOT of storage space, since the end of our shop space hadn't been walled in. I liked to dream that we'd grow, and fill the extra space with lumber or something. But a few weeks ago we received word that the space had been rented. So we had to run in and hustle to get everything out of that space before the wall went up to divide our space from that one. The extra space had given me the mental luxury of knowing that all of my someday projects had a place to stay until I'd gotten around to them. It wasn't quite as bad as a hoarding habit, but it's still a lot of mental clutter to carry around.

Now, the back end of our space is walled in, and it's been a good time to do some serious prioritizing, because time and space are getting a little short. The new wall feels a little constricting... and I think that's a good thing. I'm going to try to turn that feeling into a new fighting spirit.

Sunday, October 24, 2010

Finished installation, and Final thoughts on mounting an Emmert


Edit: 12/19/2011: I have written up a more concise and better illustrated narrative on how to install the Emmert Pattern Maker's vise here


As a result of some of the comments I got from the last post, I wanted to show how the final product turned out, and write up a more cohesive and useful narrative for anyone who's planning on installing one of these, or building a bench around one. 

With the vise re-installed, I have a gap of about an inch and a half between the right side of the vise, and the front surface of the bench top. But also notice that the bench top appears to come down a bit at that point. This isn't an illusion, the bench has a skirt under the top that's about 1" thick. The center of the bench is still 3" thick, so it's not as vile a deception as you might think. I think it's mainly so they can flat-pack the bench with the vises installed. The skirt ended here already, to allow clearance for the face vise that came on the bench. I chose to make the cut so far to the right, because it lined up with the cut in the skirt. I think it just looks cleaner. It's a 1 1/2" gap, which is more than necessary, but it's not really a deal-breaker, either.

If I were building a new bench, the top would be full thickness all the way across. I'd laminate all but the last 2", mount the vise, and then get ready to laminate one more piece of wood. I'd also spin the jaws on the installed vise to measure how much clearance I actually needed for the vise to rotate, and cut the last lamination accordingly. On a scratch-built bench, the clearance would probably be under an inch. and then thickness the last piece to be parallel to, and about 1/8" behind the extended plane of the rear jaw of the vise. I know this seems weird. It was in the original instructions for the vise, and it took me a while to figure out why. The jaws rotate. And there's a lot of mass that will be rotating. If you're off a bit, and you go to rotate your work, there's a chance you'll crunch your work into the top edge of your bench. Not cool. If you really need to clamp to the front of the bench, it's very easy to make an L-shaped shim to hang over the front edge, so you can clamp the work to the front of the bench. where the long arm of the L-shape rests on the top surface of the bench.

Another judgment call was the placement of the vise with regard to the left edge of the bench. In this case, I placed the vise to align with the dog holes that I have on the bench as it came from the factory. There's just over 2" of bench sticking out past the left-most edge of the vise. I don't think it's really going to get in the way of my ability to work, but on a new bench, I'd mount the vise all the way at the end, and drill my dog holes to line up with the vise once everything is in.


Notes on installing an Emmert or Emmert clone: 

(edited on 1/27/11 to be more readable)

I assume that anyone who's trying to mount one of these beauties has done at least a little bit of homework first. There's a lot going on here. I also assume you've read enough to know to take most of the vise apart, and work on the install with the least amount of weight possible.

The most visually obvious thing that needs to be laid out is the recess for the plate, and the holes for the three screws. You do NOT want to lay out those screws until the absolute end of the install. There are two more hidden screws that will hold the vise up while you trim and shim to get it aligned and perfect. Once you get it in the way you want it, then you'll know where you need the holes to be, and you can lay out and drill.

I was really, and justifiably, concerned with getting the mount laid out and drilled just right. The placement of those three holes determines the alignment of the vise with regards to the bench, and if they're even a little bit off, everything will be thrown off, even if it's only a little bit. Given the amount of wood that has to come out just to mount the rear jaw, the thought of getting it wrong only after you've done irreparable damage to the bench top is pretty high on the list of things that can persuade someone to steer clear of the greatest vise ever made.

I think it's conceivable to measure and lay everything out so that it will be perfectly installed with no errors. I also believe that weird things happen, iron castings are reliably not 100% square or straight, and that the human mind and hand are both fallible. A bench top is a huge, expensive, ponderous expanse that will display every evidence of your failures if you aren't able to grapple a little bit with the process of mounting your bench vise. No pressure. : ) 

This is usually where I cringe, because as sure as the day is long, I'm gonna slip up somewhere, and I do NOT want to be the yuppie bastard Emmert owner who owns an Emmert vise, but botched the installation, thus proving that I'm unworthy. In the process of hanging this 90 pound monster, I learned the following: Have faith. There's a lot more wiggle room than you think.

In addition to those 3 big mounting screws, which render every error permanent, there are also 2 more mounting screws behind the rear jaw, in a horizontal orientation, which will give you the time to figure things out a bit. Those 2 hidden screws will give you the wiggle room you need to get the install done as accurately as you are hoping to. Do all of the underside excavation first, and rout out the recess for the mounting plate. You may also have to do some hand work to get the fit right... my mounting plate was tapered in thickness from back to front. Once the plate will fit into the recess, mount only the rear jaw, using only those two horizontal screws, and trim and shim until you're happy with the alignment of the rear jaw. You can keep removing the vise while you make adjustments to the notch, until everything is just right. There's room for trial and error. Once you have the rear jaw alignment dialed in, with those two back screws nice and tight, then you can mark out the three holes for the top screws in the mounting plate. Those three screws are just the punctuation mark at the end of the sentence... the finalizing step in the long process of getting it just right. They are not the leap of faith that I was terrified they would be.

I have to point out that accuracy in drilling is important here, because the nature of countersunk screws is to completely mis-align everything if you don't drill the holes just right. But if you've made it this far, you should be just fine...

Tuesday, October 19, 2010

Emmert revisited, and a summation of the process to date.


Edit: 12/19/2011: I have written up a more concise and better illustrated narrative on how to install the Emmert Pattern Maker's vise here

Edit: 11/1/10: The bench is back together, and I've since posted some tips for anyone who wants to install one of these monstrous miracles.

So, I've been playing with... er... USING... the Emmert for a few weeks now, and I've run into a problem. Setting the vise into the front edge of the bench top was simply not a good idea. At least, not the way I was trying to do it. I read Roger Van Maren's account of how to do a flush mount, and it looked nice enough to me. And the lasting impression was that it would be a good idea.

Originally, I had a mental image of a big vise, traced out and neatly inset into the front of the bench. I thought that a reasonable clearance around the vise would be enough to let it rotate freely. It sounded neat, and clean. The reality is that the Emmert Universal vise is Big, Versatile, and it Needs Room to move around. My own mental image of an inset vise has proven to be possible, but impractical, as it restricts the most useful features of the vise.

I struggled with the issues of laying out and mounting the vise, and this is a brief run-down of my experiences in mounting an Emmert U-6 Universal. I'm not saying that this is the way to do it,  I'm simply putting down what I went through to learn what I know now.

The U-6 is huge. The main jaws are 18" wide, and 6" high. This is without the small machining jaws that are on the bottom, which have already proven their worth. The whole thing weighs something in the neighborhood of 90 pounds. This is not like other vises I've installed. Most others I could mount by lying on the floor, holding up with one hand, and drilling and installing mounting bolts with the other. Installing an Emmert is a not so easy.

---------------------------------------------------------------------------------

I knew I wanted the rear jaw to be flush with the bench. But the fact still remained that I needed to figure out a practical way to do an accurate layout, so that I could mount 90 pounds of cast iron with half a hope of getting it where I wanted it.

Eventually I conceived of clamping a board to the front edge of the bench, and wrapping the vise around that. The back face of the board would align the vise with the front face of the bench. Brilliant! After this, I took the vise off, laid down a piece of plywood to trace out my pattern, and put the vise back in place. I used the old pencil and washer trick to trace around the vise, and made a pattern that I could use to cut out my inset. And it worked.


I think that laminating another piece to the front of the bench to be in line with the vise is a better idea than flush mounting. But for those of you who want to keep the front of the bench the way it is, and are cutting into an existing bench top, I think a square cut corner notch is the way to go. But you still need to lay out and align everything before you cut the notch out. And the method I just described proved to be a viable way to do that before you cut into anything.

-Side note on the mounting plate. I mounted the plate to be just below the bench surface, which makes sense to me. But it wasn't a simple routing job. The mounting plate is actually tapered in thickness, and is thicker down where the holes are for the screws. So I had to use a chisel to make the recess deeper at the other end. I had read somewhere that the vise requires #18 wood screws. So, that's what I bought. And when it came time to do the mounting, they turned out to be too big. I drilled out the holes and countersunk further. So, my vise uses #18, but my suspicion is that other vises may call for something smaller. 

-Cutting everything out. Using the pattern I got from tracing out the upside-down vise, I used a router with bearing bits to cut into the bench top. But then I realized that I couldn't rotate the vise within the cutout. So, I broke out the carving tools and went to work. It was a pain in the ass.

AND I had to hog out a trench for the beam that houses the threaded rod. I've seen pictures of the chunk of wood that has to come out to clear the vise hub, but I hadn't really thought about beam clearance. Without the trench, the beam hit the underside of the bench, and the vise wouldn't sit square. Clearly, my bench top is thicker than the ones I've seen other pattern vises mounted to. Or, maybe I am. Or both.

-Recently, I noticed that when the vise is tilted, and I rotated the vise, the top flange of the rear jaw bangs into the top, front edge of the inset. I'd carved out a curved recess to allow the vise to rotate in a vertical direction, but it was looking like I'd have to carve more to allow it to rotate around the top edge of the inset. I decided that I'm not going to keep carving forever to make more and more clearances around the vise. It probably would have been an easy fix, but the process so far has just made things uglier and uglier.


-Flash forward to the other night. I had wrapped up work on another project, and the bench was cleaned off. I took advantage of the opportunity, and took the vise off. I took the bench top to the band saw, and ripped a notch where the vise is to be mounted. I made the crosscut to take the last piece out with a Festool track saw. If there's an irony here, it's that it was easier to move the whole 8' bench top to the band saw to do the ripping, but it was easier to do the crosscutting part with a handheld power tool.


As I said before, if I were going to build a bench to hold an Emmert, I'd laminate most of the top, mount the vise, and then laminate one more board to the front to get the front edge to be flush with the rear jaw. This whole learning process has done nothing but reinforce that opinion.

On the one hand, I hope it'll be the last time I have to deal with any of this, and I can now get back to work. On the other hand, knowing what I know now, it would also be fun, for the sake of the blog, and the people who read it, to do a new install, and document the process a little better. I'm on the fence about writing up my own version of a comprehensive set of mounting instructions; there are a lot of good resources out there already, and between this entry, and the second one, I think I've put up all the information that I would have found to be useful. But if I get enough requests for a step-by-step, comprehensive instruction set, I'll do it.

Tuesday, September 28, 2010

On a smaller scale...

So, I think that one of the worst lagging parts of the 80s for me is the notion that ideas have to be original. It's gotten into my head enough that there are times when I almost discount an idea, just because I've seen or heard of it before.

Today was a good example of that. I got into the shop and I was sketching the slabs and brainstorming, and trying to think of just what kind of base to use, etc. And then it occurred to me that I might make a scale model.

I almost didn't. I've seen other furniture builders make them, and it seems cute, but somehow not quite my thing. But as I was sketching, I realized very quickly that a 2 dimensional sketch just isn't the same thing, and it won't give me a feel for how the proportions are going to play out when I build the thing. I love the table I made for our living room, for example, but I think if I had to do it over again, I might move the legs inwards, just by an inch or two.

Anyway, I took some rough measurements of the table, and I got out the drawing for the slab table form last July to get an idea of what kind of dimensions I was dealing with. Then I divided everything by eight, ran the math, and went to make miniature parts.

The results are pretty cool. It's a neat design. But I also noticed a few other things. I like the idea of using these proportions, but for a larger project, like a trestle table for the dining room. I like using the trestles with the stretcher on top. But I also like it with the stretcher on the bottom. And while the idea was to make a slab table for a live edge piece of wood, the proportions look good with a squared off plank, too.

Since the point, for me, was to play with proportions, and not to execute the joinery in miniature, I made the base so that the trestles could slide along the stretcher. It was a huge help, and I noticed pretty quickly that too close to the ends and too close to each other are pretty easily spotted. The perfect spacing is going to be less obvious, but I can take pictures and compare.

I had other ideas once the proportions were out of my head. I worked out the joinery a year and a half ago, but I had a few new ideas for usage this afternoon, to make a larger table, with 4 legs, instead of 2 trestles, but that's another plan for another project, and I still have to get through these ones.

When the new ideas come out, I know I'm in a good place.

More soon.

Monday, September 27, 2010

New Slab Tables

I've had these two slabs for around 4 years now. They're both curly maple, I'm pretty sure they're from the same tree, and I'm pretty sure that the tree had an ant problem, which would be the reason for the holes, and the coloring of the wood.

When I bought them, I really had no idea what I should do with them to really make the most of them. I'm still not sure. But I do know that there's always more wood, and gorgeous wood that I can't figure out how to use is less useful to me than gorgeous wood that I can build with. And leaving them up on the rack just isn't really appropriate for my operation right now. These tables are speculative pieces, and they will be available for sale.

I'm still trying to figure out what each table is going to look like. I imagine it will be related to this table that I built a year and a half ago. But I still need to figure out how I'm going to trim the ends, etc. And the slab with the more severe taper will be a little more challenging when it comes to design.

I pulled these off the rack a month or two ago, and eventually put them back when I started messing with benches. Tonight I took them back out, and took time to start picking out the dirt and grass and debris from the ants' nest in the larger slab, and to pry out the bark inclusions. I was surprised at how much of a difference it made to have the bark removed: suddenly, there was more surface variation than just the ants' nest in the end.


Surprisingly, most of the holes do not go clear through the board. But at least one does. : )

I also took the time to dig away at a punky section on the larger board, first with a small chisel, then with a bigger chisel, and finally with a small hatchet.

Thursday, September 23, 2010

Buffing wheel part II

So, I spent a bit of time today, fussing with the grinder.

My main issue was that I didn't like working from the back of the grinder, because the light, which is hard-mounted to the grinder pedestal, was in the way. That, and I don't like reaching around and fumbling for a switch to turn off a still-moving tool. It violates a basic premise of power tool safety: Keep your eyes on the moving parts at all times. I can't do that effectively if I have to reach over and in front of the wheels.

I pulled the grinder apart, and opened up the bottom to pull and tug at the wiring. I was shooting text messages back and forth with an electrical engineer friend of mine. But even with trying to re-wire the thing, it still ran the same direction. Eventually I concluded that not only was it a royal pain in the neck to try to figure out, but even if I did get it right, it would spin the nuts off of the drive shaft while running, which is not exactly optimal.

I did figure out that I could detach the pedestal and turn it around, though. So now I'm working at the back of the motor, and the front of the pedestal... so the wheels are turning in the proper direction for buffing, I can see and reach the switch, and the lamp isn't in the way.

The other thing I had planned was to use the veritas tool rest in conjunction with the felt wheel. One of the issues that keeps coming up is that buffing wheels are notorious for rounding over tool edges. The felt wheel is harder, which is, I'm told, less likely to round over the tool edges, and the tool rest will hopefully help me to present the tool to the wheel at a better angle for buffing. I tried this on a chisel this afternoon... so far, so good.

Next step is to get a finer grit sanding belt for the belt grinder, so that I can (hopefully) bring tools directly from the grinder to the buffing wheel and get right back to work.

Wednesday, September 22, 2010

Buffing wheel part I

So, following a discussion a couple of months ago about sharpening with a buffing wheel, I finally went out and bought one for my 6" grinder, and a felt wheel as well.

The general idea is that the buffing wheel will make short work of putting a final polish on a tool, or touching up a tool, which is only similar to stropping in spirit, I think... I'll explore the real details in a follow-up post.

I got the wheels partially set up yesterday, and played with them a bit. I need to rework the guards on the grinder, which I'll do later this week, but initial testing of the buffing wheel thing as a way to keep my tools sharp left me feeling wowed. Among other things, I buffed my pocket knife, which I typically keep un-necessarily sharp. My shiny sharp edge turned into a BRIGHT shine, even sharper edge, in almost no time.

Better results in much less time is something I'm very excited about.

More soon.

Monday, September 20, 2010

EMMERT EPILOGUE


Edit: 12/19/2011: I have written up a more concise and better illustrated narrative on how to install the Emmert Pattern Maker's vise here


So, the Emmert is in, it's nice. I haven't used it for much, because I still need to do some carving to help with clearance of the jaws when it's rotating. In short, it rotates just fine when it isn't tilted. Tilting and then rotating, not so good.

I'm debating the virtues of just making a larger, square notch in that corner of the bench top. I feel it will be easier, and look nicer. We'll see...

In other news, I'm working on a refinishing project. nothing fancy, but it'll help pay the bills.

Sunday, September 12, 2010

The Emmert Vise


Edit: 12/19/2011: I have written up a more concise and better illustrated narrative on how to install the Emmert Pattern Maker's vise here

So, now that the top is flat, and the drawers are all re-built, one more major task remained... mounting this vise that I've been sitting on for so long. I got going on this last part of the bench project a few days ago. Once in a while, something clicks, and it all just works out.

There was a lot involved in putting this thing in, because I took the more difficult road. Most of the time, I see these vises mounted in the most simple way possible... which is still pretty involved... but the owners simple mount them to the front edge of the bench without trying to get the rear jaw flush with the face of the bench. I can totally understand why people do it this way: the vise needs a lot of clearance to be able to rotate and tilt and do all of the other things that it does. I'm still knocking down high spots that interfere with rotation at various angles.

Knowing what I know now, if I were to build a new bench that were going to have a pattern maker's vise on it, I think I'd use a hybrid method... glue up most of the bench top, mount the vise to the front edge, and make the last strip of the top thick enough to come up to be in line with the rear jaw once the vise were properly installed. I think it's important to be able to clamp things in the vise and against the front edge of the bench at the same time, which is why I bothered to go through the effort of mounting the vise the way that I did.

There are a few more small things to do to the bench. I'd like it to be an inch or two shorter than it is. And I have a few alignments that I need the make on the vise... the rear jaw is sitting a little bit high. But the grunt work of this detour from daily productivity is pretty much done.

Sunday, September 5, 2010

One Good Whuppin

I have a long list of complaints about my Sjoberg Elite 2500. But after a lot of avoidant behavior on my part, I decided that the money I spent on the thing was a good reason to get it back in workable shape. 

First step was to rebuild the drawers.

The top tier of drawers was too tall in the sides... they rubbed on the top of the carcase, and the extra friction made it hard to open them, and I'm sure contributed to the fronts pulling loose. No good. So I disassembled them, trimmed the sides and back, chamfered the top edges, and added glue to the butt joints when I screwed them back together.

I also added chamfers to the top edges of the second tier down. I didn't need to modify the drawers. But I stuck with the glued-up butt joint idea. Same thing for the bottom drawers. Gotta love pre-fab... the fronts are tall, but they use the same (shorter) sides and back as the upper drawers. I did notice that they chose the wood thoughtfully... the back is made of maple, and the sides are something a little softer and more porous. The sides are screwed to the ends of the back, and the maple holds the threads well, while the softer wood crushes a bit, allowing the screw heads to sink in, and lessening the likelihood of stripping the holes in the maple. While it was nice to see that evidence of thoughtfulness, it's still a pre-fab, screwed together drawer, and isn't really worth getting worked up over.

After all that, I took some time to think about how to mount the Emmert vise. Calm down... it's not happening for a little while yet.

Ultimately, I decided that there was no point in mounting the thing if the top wasn't flat, for various reasons. So, I spent a good chunk of time planing the hump out of the middle of the bench top. The center was something close to 1/8" higher than the ends. Across an 8' top, that's a lot of wood that has to come off. It was a busy day, with a lot of sweating involved.


 Eventually, it was flattened out. While cleaning out the drawers, I came across a bottle of oil for finishing the top, that had come packaged with the bench when I bought it 3 years ago. So, I put on a good coat of finish, and called it a day. My apologies for the garish yellow... I swear it doesn't look like it was finished with a highlighter. Notice the blast radius of the shavings on the floor... I took a lot of wood off of the top.

Friday, August 27, 2010

The 100 Thing Challenge

This morning my wonderful wife to be approached me with something called the 100 Thing Challenge. In essence, it's an anti-materialistic approach to living, and the challenge is to limit yourself to 100 things that you own. Some items like Socks and Underwear are considered necessities, and so aren't counted. Shared household items are also not counted. But other individual things like a pencil, a pen, a chair, a clock, and so forth, do get counted, as do individual pieces of clothing. There's an example of someone who's trying this out here. The gist is that people have too much stuff. And it might be nice to learn to live without it and see if happiness is still possible.


I think, in theory, that this is a really cool idea.We've moved twice in the past 2 years... and just renewed out lease in the current place, which made us happy. But we know that once the household adds members that another move will need to take place. And it might be nice to not have to move as much stuff. Fewer books, for instance. Living with less stuff would be nice, too, but as I started listing things this morning, I realized pretty quickly that I have a lot more than I think I do.

Part of the woodworker in me yearns for people to understand that owning fewer things of higher quality is a good idea. I do think that the idea of owning fewer things will open people up to the idea of owning fewer, but better things... and that's my line of work. But the guy in me that just brought home a small pile of tools, and a bench, and so on, feels like this is a little bit of a mean prank.

I don't even want to think about what I have at the woodshop. Technically, it's supposed to be a professional shop. Realistically, I have way more tools than I have a reason to own. Outfitting a shop is a huge undertaking, and there's a really long shopping list. But I still have a lot of stuff.

I'm still interested in giving the challenge a shot, but I think I'm going to have to find clever ways of making some groups or sets into items. "Set of woodworking tools" would have to be one item. "Set of kitchen knives," "Set of pots and pans," and so on. This isn't technically a woodworking-related thread, but I thought it was worth mentioning. I know a lot of woodworkers who have amassed incredible piles of stuff. Tools, unfinished projects, things they keep meaning to get around to doing...

The thought of doing more with less, seems like it'd be really hard to fit into modern woodworking theory as it gets dispensed in the stores and magazines. There's always a shiny new toy to be had.  Between all the hand tools, power tools, bits, blades, jigs, accessories, there's a lot that can take up space. But at the same time, Brian Boggs started out with just a backpack full of hand tools. And even Chris Schwartz, who's known for being the harbinger of shiny and expensive, is hawking the tools he doesn't use anymore on his blog, and even his castoffs are really nice tools. So maybe the trend is starting to take hold...

Such a small bench...

So, the workspace at home is expanding in a mildly containable way. Next to the bench is a rolling stack consisting of a small festool vac, with a vacuum attachment set, a Bosch jigsaw, and a festool drill, in a larger-than-stock container, so that I have room in there for a belt pouch, some bits, etc.

On the bench is the carcase for the new chest of drawers project, all of the drawer stock, and various other things. There's a tool chest on the shelf, along with some cauls, and a roll of chisels that belongs in the tool chest. (The chisels belong in the chest, the roll does not) But I need to make a rack for the chisels first, so that they don't rattle around and bang into each other.

Last night I ran into one of the home woodworker's main problems... night-time. I started futzing, and sawing a small piece for the chest of drawers when I was reminded that it was getting late, and I was being very noisy. And by the way, are you going to sweep all that up?

Grumble, grumble.

The other problem I'm running into is real estate. it's only a 4.5' bench. So space for projects is very limited. Space to work while keeping projects on the bench? Even more limited.

More as it comes.

Monday, August 23, 2010

New Bench compromise: the outcome.

On a topic separate from the sporadic schedule I've had lately, I feel the need to offer another apology, or at least confess to a bit of embarassment. The two posts that I made in June and July do a wonderful job of displaying the mental process I'm going through with regard to how to re-fashion my work habits. But going directly from "NEW BENCH PROJECT!" to "NO BENCH PROJECT!" is just a bit mean.

For most wood geeks, I think that talking about a new bench project is almost... but not quite... a little like talking about sex. Most woodworkers will perk up when the topic comes up. The finished bench is kind of like the new baby, and everyone likes to see, and it's very exciting in it's potential. But I have to admit that I think the process of making the new baby is a little more intriguing to observe sometimes. So the abrupt turnaround is a bit of a tease.

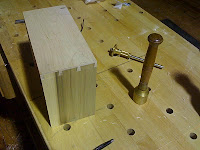
Here's the final compromise. The bench I built a couple of years ago has been shortened, and is now in my front hallway. And the Sjoberg I bought years ago is my bench in the shop. It's an ugly monster, and I'm going to go through the paces of tuning it up. That means fixing a few of the drawers, flattening the top, lowering the working height, and a few other things.

The plan is to design specific projects to build at home, mill up rough stock in the shop, and process the parts at home. One of the things I noticed almost right away is that there are a lot of small details that I'm used to having around, or not needing at all, due to the availability of machines. one of the first details is simply having cauls to work with, or work on, or use for clamping. So I roughed those out at the shop, and planed them to size last night. I also need to make some bench hooks and a shooting board.

The first furniture project is to finish up a small chest of drawers that's been languishing since this post, which went up about a year and a half ago. I glued the carcase up then, and if you look through old pictures of the shop, you'll see it up on the shelves, waiting for me to get it wrapped up. I milled up drawer pieces the other day, and I'll post pictures when I bring it all home.

Psycho Summer. And getting back on track.

I apologize for the sporadic post schedule and the vagueness of the posts over the summer. The schedule with the US Census had me at my wits end...


By way of example, the block of maple I alluded to cutting back in the beginning of June was the start of what should have been a pretty simple project. But it still took me two and a half months to deliver. The project was a simple kitchen island made with fir and tap-hole maple. I know that's a funny designation for the kind of maple used, but I've also heard of buckshot maple, wormy maple, (otherwise known as ambrosia maple), quilted and curly maple, and so on. So it's not a designation having to do with species necessarily... But I digress. This is an early shot of the island as it was coming together. I'll put up more pictures soon. The final result was nice, but it did highlight for me the fact that my hand skills are a little bit rusty.

More has been going on than just the island and the Census. I now have a workbench at home, and the work area at the shop has been altered. And I have big plans for both spaces coming up. The past half year has felt pretty catastrophic at times, and while woodwork has been kept on the back burner for a while, I'd intended to keep the back burner turned on. 

Monday, July 19, 2010

The despicable art of compromise. No new benches for now.

So, I did some soul searching about the proposed new bench projects. The short version is, I'm putting them off until I feel more secure in the idea that it's reasonable to build two new benches. That day won't come for a while.

Ready to bring home
The home bench project... I spent weeks poring over all of my workbench books, and sketching out versions of modified, shortened shaker style benches.  I really wanted a bench with a lot of storage, to hold all of the household tools and project "stuff." But the point of having a bench at home is to get my hand skills back up to snuff, and try a few new things that have intrigued me for a while now. I'm more interested in getting right to work than I am in detouring further into new-bench fantasies. So I decided that the best solution was to simply chop down the bench I had at the shop. The work is done, and the most noteworthy part of the exercise was using Chris' huge old Oliver sliding table saw. It's a terrifying machine that gives me the willies. But it's incredibly capable, and it's impossible for me not to be impressed. Cross-cutting a 2.5" thick, 24" wide maple top is not a small thing, I don't think. This machine thinks otherwise.

Shape of things to come
And the shop bench... well, when the shop is more profitable, the shop will be able to afford a new bench. I have many ideas. In the meantime, while my regular bench has been chopped and taken home, I do still have an 8' Sjoberg Elite that I can use. I thought it was nice when I bought it. It has since been moved to my shop equipment shit list. I have a list of issues with this bench, not the least of which is that it's been pretty unstable. At this point, it's moved back to something more closely resembling flat, so I feel reasonably comfortable in resurfacing it. But 2 years ago it was warped enough that re-flattening would have taken out something around 1/4" to 1/2" of the overall thickness. Had I done so, and then allowed it all to stabilize again, I'd have lost another 1/4" in flattening it now. I've thought about touching it up and selling it, but the truth is that I have better ways to spend my time. So I'll make it work, until I feel good about building something better.

I could bash this bench all day, but it's possible that I'm just being an overly fussy prick about something that will still do the job. It's big, it's heavy, and it's thick enough to support the massive Emmert, I think... It's long enough to be useful, and it does have some pretty hefty bench dogs. And now that it's a few years old, the wood may have seasoned enough that it will be pretty stable. I can hope, anyway. For now, I'm planning the Emmert install... and working on more profitable things in the meantime.

Monday, June 21, 2010

General update... bench projects on the way.

As I've mentioned in the last two posts, my hand skills are in need of a serious dusting off. So, one of the solutions is to start doing a little bit of work at home. Once I'm done with the current project, and make more progress on the chess table refinishing, I'm going to be making a small bench for use at home.

It should be an interesting project to write about, for several reasons. First and most obvious, I'm a woodworking geek, and there's just something about building a workbench that just gets me going. I'm going to have to flex my creative muscles, because I want to make the bench out of material I already have on hand, rather than splurging on new lumber or hardware. That may sound a little misleading, since I have a fair amount of nice lumber on hand. This isn't going to be a budget bench, or built out of scraps, and the vise will come from one of my benches at the shop. But the other reason that the project will be possibly interesting to home-bound hobbyists is that the at home context adds a few complications.

This is going to be a short bench: it's not going to be longer than 4.5 feet, if it's that long. For most work, that should still be enough space, but it's still smaller than I'm used to taking up. I've been taking my time with the design to make sure it's as useful as possible, with minimal wasted space. Since space is at a premium, I'm going to include built-in tool storage. It's not clear yet whether or not that element will be completed in the shop, or at home. I'm guessing home,  since building drawers is a good skills building exercise, but we'll see.

Because this will be at home, I want the bench to look pretty nice. No, I'm not planning on serving dinner on it or anything, but it'll be located in the entryway just inside my front door. If I have clients come by to visit, I want them to be immediately impressed. The top will be laminated out of maple that I have on hand. The frame will be built with some cherry that I've had around for a while. I'm planning to use some wedged tusk tenons to tighten up the stretchers, as a decorative element; no exposed nuts and bolts. (Not that it's hard to hide nuts and bolts, but this seemed like a more elegant solution to holding the frame together.)

In other bench building news, I'll also be reworking my bench in the shop. The short of it is that I've decided I want a longer and thicker bench surface that will accommodate the Emmert vise I've been sitting on for over a year now. This winter's chair-building exercises have sold me on its virtues, and it's time to put it to good use.

For the serious geeks who check in periodically and want to know, the influences on the home bench will be taken from Chris Schwartz' book, mixed with some Shaker sensibilities and a few other ideas. The new bench at the shop will probably have some serious French influences.

...and a few more...

I had a few hours to kill, so I headed up to the shop again today to cut some more dovetails. The project is at a standstill until I get the 2 drawers cut, but because it's been so long, I really want to make sure I can still cut good drawers by hand. The most recent sets were very promising. Not super-perfect, but nice and tight, no blowouts, no real issues... but there were still some (very small) gaps. I only had time to cut 2 full joints before the real world called me away, but I'm reassured that my hand skills have not completely dissipated over the past year.

Just as a goof, I used two different saws this time... a Japanese style saw for one of the joints, and a euro-style saw that was made for me by Adam Cherubini. The question I was asking myself when I decided to do this, had to do with the fact that I used Japanese saws pretty exclusively through school, and on most of my projects since then. But somewhere along the line, I picked up a couple of smaller dovetail saws, just to expand my skill range. So, the thought I had was that maybe the sloppiness the other day was due to the fact that I wasn't using the (more familiar) Japanese style. Short answer: nope. Just out of practice.

I have enough of my practice wood to cut a few more practice rounds before I make these drawers, and deliver the final product, after which I'll talk more about it. It's intended to be a surprise, which is why I haven't given much in the way of details.

Saturday, June 19, 2010

Been a while

It's been a hard year. Survivable, and I know I'm not alone, but still hard.

Survivable is the key word in that last sentence, as evidenced by the fact that I'm slowly getting more shop time in. And just the other night, I was able to get in and chop some dovetails.

I have 2 drawers to cut for the current project, but it's been over a year since I've cut any. That's a little bit disheartening to think about, but it's true. So, I feel thankful that I had the presence of mind to cut some practice ones first. And based on the results, I think I'll be cutting a few more before touching the real ones.

The issues may not be readily apparent in a small picture, but they're there, and I need to sharpen my skills some more.

Wednesday, June 9, 2010

MMMMMM... wormy

So, I was up in the shop the other day, trimming the ends off of a laminated maple top for a project I'm working on. It's solid maple, and plenty thick, so I made the rough cuts to length at my bench with a worm drive circ saw. Buried the blade to full depth in the maple block, and it just kept chugging.

I really love worm drive saws. Not a whole lot of use for them on a daily basis, but man do they have power.

Tuesday, May 25, 2010

Boucing back

So, one of the reasons I haven't been blogging is that my computer, until yesterday, had been out of commission. Like so many other stories of loss, it went to sleep one afternoon, and just wouldn't wake up. Thankfully, that's been fixed. I can't say how long it's been out of commission, but it's been a while, certainly over a month.

It was a bit of a shock to sign into the blog for the first time and see where I was a month and a half ago. I'm in a much better space than I was.

The bartending thing hasn't taken off yet, I'm sorry to say. But it hasn't taken off, because I've been working as a supervisor for the US Census Bureau. I won't bore you with too many details, but it's been good, solid work, that pays good, solid money. And it's been a constantly shifting situation, which has been refreshing, in a bizarre way. I like things that are always changing, and this is one of those jobs. Thanks to my time in the military, and my recent forays into running a business, I feel like I was very well prepared. And I was lucky enough to wind up with a supervisor who appreciates the work that I do, and my ability to react in a productive way to a constantly changing landscape.

The shop is slowly spinning back up again. Obligations in my time off have taken up more time than normal, with a couple of short night classes thrown into the mix, reducing my ability to go to the shop at night. But I have been up, and I'm getting back into a few projects, one of which is a pair of chairs, and another is a small bench for doing hand work at home. The bench project is in the planning stages, but it should be fun. It's also going to coincide with a redux of one of the existing benches that I have in the shop right now, so I can get my Emmert vise mounted and usable.

There's more, but I wanted to check in and let the world know that things have rebounded, and the world is looking better from here.

Wednesday, April 7, 2010

Hitting bottom.

Obviously, I haven't written in a while. I haven't been in the shop, either.

In a word, I've been unemployed. And I needed to bottom out. It sounds a little weird, but it makes sense to me. I feel the need to clear the air, and iterate where I am now.

In short, I haven't brought anything I'm happy with to completion in almost a year. Since then, I've been either working temp jobs or looking for temp jobs. And I think I really needed that time away to think about things, and re-assess. It's not a new phenomenon... after the first few months of dating my fiancee, we broke up, and I had to take the summer to make the necessary adjustments, and come back with a better idea of what I wanted. Four years after we started dating, we're happily engaged, and getting married in the fall.

In the past three years I've set up shop three times. And when I wasn't doing that, I was panicking about how I was going to make it pay. And in the end, working militantly alone, I couldn't make it pay.

Looking back, I think that if I'd either focused on marketing myself as a builder, or focused on building and outsourced the marketing, I'd have been fine. But in the end, I can't do everything well, and I needed to learn that the hard way. Thankfully, two good friends have come forward to remind me that they are well enough connected that they think they can represent my interests to the right people. I'm in the process now of cleaning up my final piece from school, to test this theory. From now on, I'll rely on them to help me with the sales end of things.

For now, I'm still working temp jobs. The current one is predicted to run for 8-10 weeks, and has a pretty flexible schedule. I've also just completed bartending school. My plan, such as it is, is to continue to work flexible jobs to pay the bills. Money was my greatest source of stress. And my stress level kept me from doing good or efficient work. So, the side jobs will serve to help alleviate that stress. When I'm not working my temp job or tending bar, I'll be in the shop, focusing on two things: I want to build the best and most impressive pieces of furniture that I'm capable of building. And I want to continue to stretch my capabilities.

I committed myself to fine woodworking to pursue that kind of work, and that level of skill. It's taken me three years, and many bumps and bruises to remember that.

Thursday, February 18, 2010

Update

So, I've been in and out for the past couple of weeks. I decided to rearrange a little bit of my work area, to make it make more sense to me. I spun up a side project, which I'll talk a little more about at some point. I've come up with new chair patters, and I'm pissed off.

The work space I laid out is nice, but one of the things I've noticed as I go along is that it inevitably ends up looking trashed. Most of the stuff I don't need, things I'm not using, and so forth, end up littering the surrounding areas. And I'm able to ignore most of it because it's behind me. As are most of my tools... so I have to turn around when I'm at the bench to get my hands on anything.

Well, I solved some of that for now. First, there's a big table that I own that I've used as an auxiliary bench, but I've always used it as a crap-catcher of sorts. Now it's an auxiliary work table, underneath the window. A place to do assemblies, to leave wood stickered when I'm not playing with it, that wort of thing. What I'd been doing with it before is leaving it tucked under a shelf, and using it to hold things like drills and hardware organizers. Not a great use of space, and not a great habit to get into.  I did tuck a few things underneath it... like my antique tool chest, my Emmert vise, and a Festool Vacuum. The Emmert needs to be mounted to something soon, I'm tired of having and not using something that is so well suited to chair making.

Parallel to that, is my bench. It's now 90 degrees to the wall, which means the big storage cabinet is to my left, and I don't have to turn completely around to get to it. And parallel to that is the shaving horse.

Side project is a crate that someone was throwing away. For a packing crate, it's surprisingly well put together, and as I've been trying to work out a few ideas on movable furniture, I thought that a very nicely made dresser built into a packing crate is a sort of metaphor for the kind of furniture I've had a use for for several years now. So, I'm going to build a nice dresser into the packing crate.

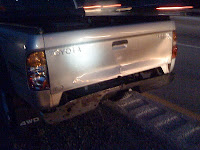
Lastly, I'm pissed off. I mad a lumber trip a week and some ago, and didn't get enough of what I thought I needed. I made a second trip up last week, didn't make it before they closed, and on the way home, my truck got rear-ended by a small bus. So, I'm still chasing the insurance company to get that sorted out. Hopefully soon it'll all be behind me in more than a literal sense.

Tuesday, February 2, 2010

10,000 hours? You gotta be kidding me...

So, I recently finished The Outliers, by Malcolm Gladwell. It's a great book for many reasons, but it does put forth his theory, which sounds unfortunately true, that it takes roughly 10,000 hours to become a real expert at anything... which generally entails about 8-10 years of regular work. If you're actually doing whatever it is for 40 hours a week, 50 weeks a year, it's probably closer to 5 years... but even still, that's a lot of time. Especially considering all the skills implied in woodworking that I want to become expert at.

Considering that my workdays right now consist of getting up at 6, eat, go to work by 7, work 8 hours, (and working on my new business and marketing plan during lunch break) ...then go to the shop for a few hours, then home, eat, and bed... so it's going to be a while before I'm an expert small businessman or woodworker or anything like that. AND I have to keep up my woodworking skills in the meantime.

I guess it could be a really imposing thing, but it's really helped me get a few priorities in order. The last few times I've been to the shop have been overshadowed by the fact that I'm still trying to put gas in the tank for the shop, get a better sense of direction with all of it, work full time, and more. So typically I show up in the evening for an hour, futz with a few things, lamenting that I need lumber and more time, and blah blah blah...But now that I think about it from the 10,000 hour perspective, I really don't have time for any of that. I gotta start working. Even if I'm just dusting off skills I already have, shop time is work time, and I need to make the most of everything while I'm in there.

So... I just about have the details worked out for the next chair prototype, and with any luck, this one will be the last before I can start trying to crank them out more regularly and sell them. And in the meantime, I have some dovetailing exercises to get back to, and then... and then...

Friday, January 29, 2010

Getting ready for a reboot.

So, the ideas are slowly emerging from the recesses of my head-cold addled brains...

JamesWatriss.com is off the air... for now. Mom did a good job of getting it up and maintaining it for me, and now I'm going to rebuild it from scratch.

This starts, of course, with domain hosting, which I'm trying to research now. Basically, I'm looking for a cheap, safe place to host a simple website, where I get to keep the domain name for myself, and hopefully not have to pay too much money to keep it up. Keeping ownership of the name is obviously a big thing, since it's my name. Feel free to offer comments and suggestions... I'm a total noob when it comes to actually putting up a website.

After that, I'm in the process of restructuring how I do business. I've been working on a new mission statement, and developing a new business plan, and marketing plan. And I'm developing a few ideas for the furniture I want to build. I'd love to do all commissions, all the time. But I think everyone wants that, and they all want to be the ebst and the brightest...

IF I can keep the ship steady, and IF I can make things work, I'll still work on custom work, probably involving reproduction. Very likely, it won't be on a commission basis, it'll be me working on the things I want to work on. I'll probably sell it.. but there are so many ifs involved right now that I really can't think much farther than "I'd really like to do this... I just don't know how yet."

There's a lot in the pipeline... it seems like there's a little more ever day that I have to get to. But I am getting to it.

Saturday, January 16, 2010

Back to the drawing board

The past 6 months have been a very busy time. I was reminded of this the other night when I went to use my drafting table. It still had the drawing for the coffee table taped on, and the adhesive from the tape had been smeared in the summer heat. It took a while to get the tape off, and get the adhesive cleaned off, but finally I was ready to move on.

I've gotten started on the drawing for chair prototype number 3. Previous drawings were made on pieces of plywood, because it made a few things easier at the time. But now that I have a better handle on what's going on, (I think?) I think that a paper drawing will serve me better to help work out a few of the finer details I was having a hard time with while I improvised and free-handed my way through the first two. They're both functional chairs, and I think I like them for what they are, but neither is as comfortable as I would have liked, so the new design will be a little more flexible in terms of how the back is to be installed. I have a few other ideas in mind, too, that will let me play with the chair form a little more, but we'll see how those come together, or not.


Wednesday, January 13, 2010

Finally... I have some shop time. But it's COLD

Thank God the stupid holidays are over. Between a day job, a seasonal job, family obligations, putting in the time after slacking on family obligations while doing seasonal work, and dealing with wedding-related things... I finally am past it all and back into something resembling a regular schedule. Well, past most of it... wedding isn't for another 9 months.

So, this evening I had a planned wedding planning engagement, but it got canceled last minute.

Cool! I can run up to the shop!

I got up there, and I remembered very quickly just how cold it got last year! Holy crap! Last year I was smart enough to leave heavy, warm clothing to work in... and I took it all home over the summer.

I talked to Chris for a while, until he left. I hung out for about an hour after that, and left... it was just too damned cold to get anything done without heavier clothing on. I packed up the relevant notes and books, and headed home.

Last thought for the evening. One of the projects I've been trying to work out for the past several years is to finish writing a book on my experiences at North Bennet, and working in Woodworking retail. I think it's time I made a promise to myself that I'll write for at least an hour a night. The only way to keep up writing skills, after all, is to write.

Sorry to be away for so long. Talk to all of you soon.